|

fabrics
& sewing
basic
medieval
clothing
sewing
tutorials
eyelet
tutorial
buttonhole
tutorial
cloth
button
tutorial
lucet
cord
tutorial
tassel
tutorial

|

Sewing
Tutorial:
14th and 15th Century Medieval London Buttoned Hood

What a medieval hood looks like.
A proper 14th century medieval hood usually has triangle gores,
either at the front or on the shoulders and a groovy, long liripipe
hanging down the back and this is a fairly easy hood to put together.
It only has 4 seams. If you line it in another colour, it has
10 seams- 4 seams each and two to join! It can have buttons down
the front or be worn open like the picture in the manuscript.
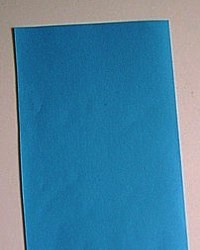 |
Step
1.
You need: fabric, scissors, pattern (pretty sure you can get
this from online) and pins.
Right. Lie your fabric flat and open like the picture. |
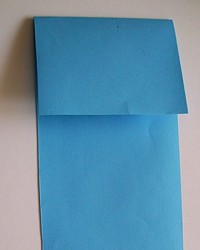 |
Step
2.
Now fold your fabric horizontally like this.
The top of your hood is going to go right across the top.
You can sew your liripipe as part of this, or separately. |
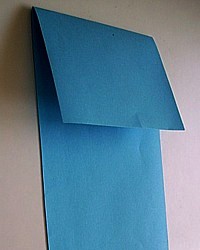 |
Step 3.
Last minute fabric fold check!
Here's a side picture of the folded fabric to make sure
you've folded the right way.
Right! Now we are ready to start.
|
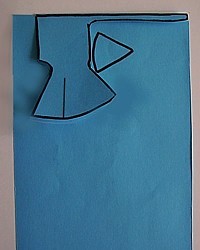 |
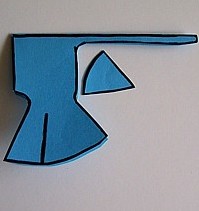
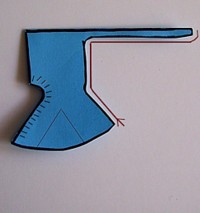
Step
4.
Position your hood pattern along the top fold of the fabric
and pin! pin! pin!
If you have a really limited amount of fabric, the dangly
liripipe at the back can be cut out separately and sewn on
later.
Okay, now cut out your hood! Don't cut the dotted line or
the buttonholes. Yes, the face opening looks really long,
but it's often folded or rolled back. Your triangle gore fits
in the front. It looks like this. |
 |
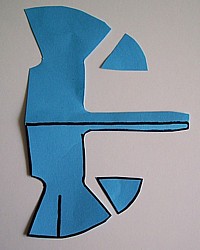
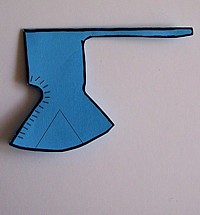
Step
5
Cut the hood out and remove the excess fabric.
The line running vertically up where the shoulder goes is
almost as long as the sides if the triangle gore, but not
quite.
The exact length will depend on your pattern. |
 |
Step
6
If you DID cut the dangly liripipe separately, now is the
time to unfold your hood, measure half way down the back of
the hood and sew the dangly liripipe on so it looks like this.
You will have one triangle gore for each side. |
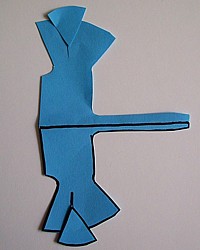 |
Step
7
Position your two pointy triangle gores so the top of the
triangle goes into the top of the cut in the fabric.
Double check you have your fabric the right way out.
Okay, pin pin pin! |
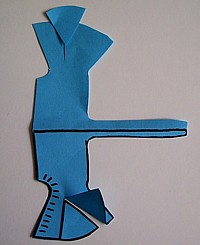 |
Step
8
When you sew your triangle gore in, do one side first. The
the other side. If you just sew up and back in one hit, you
might end up with a chunky bit at the top of the gore.
If you are hand-stitching, you will definitely want to stitch
your fabric down one side at a time, especially if you're
using wool and medieval sewing techniques. |
 |
Step
9
Right! Now you have your triangle gores sewn in, it's time
to join the two sides of the hood together. Make sure your
good side of the fabric is on the inside and you are sewing
the wrong side of the fabric.
Sew along the red line. It's usually easier to sew upwards
because if things aren't lining up properly, you'll be adjusting
the liripipe and that's easy. |
 |
Step
10
Now you're down the buttonholes and buttons.
Remember, buttonholess go horizontally at the very edge of
the fabric and they should be about 2cm or an inch apart.
You will probably have somewhere about 14 buttonholes.
To make the buttons, you just need some cloth scraps from
the hood and the MAKING
BUTTONS TUTORIAL. The tutorial will show you how to make
your own buttons. Remember, your buttons go at the very edge
of the fabric, not in from the side like we do today. |
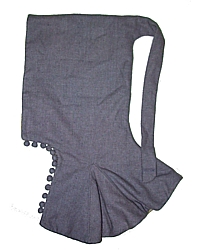 |
The
finished product!
Here is my hand-stitched, 14th century wool hood. It's lined
which you can't see here, and has 13 buttonholes and buttons.
The side shoulder gores look a little wrinkly in this photo
but when I'm wearing it, it smoothes out over the shoulders.
This was a medium-weight wool twill in a herringbone stripe.
I hand-dyed the outer and left the inner a nautral wool colour.
Happy sewing! |
Notes
on lining the hood.
If you want to line this hood, do that before you add buttonholes.
To do that, just cut and make two identical hoods and sew them
together.
Remember the good sides go together when you are sewing so when
you turn them inside out, the good fabric is on the outside
where you want it.
Sew the two together starting at face opening and sewing all
the way around leaving a little opening to flip the hood the
right way out. Then stitch your last section closed.

Copyright
© Rosalie Gilbert
All text & photographs within this site are the property
of Rosalie Gilbert unless stated.
Art & artifact images remain the property of the owner.
Images and text may not be copied and used without permission.
|