|

fabrics
& sewing
basic
medieval
clothing
sewing
tutorials
eyelet
tutorial
buttonhole
tutorial
cloth
button
tutorial
lucet
cord
tutorial
tassel
tutorial

|

Sewing
Tutorial:
14th Century Frilled Fillet for use with a Barbette
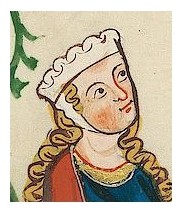 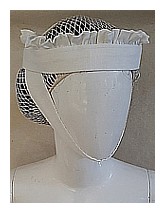
The frilled or ruffled fillet can be seen in medieval art in the
early 14th century, usually pre-1350s. There are a number of variations,
ranging from plain and unfrilled, frilly and pleated-looking.
Their exact manufacture is unclear as there are no existing ones,
so all we can do is make them with techniques which are known
from materials which were used. It is always worn with a barbette.
This tutorial is only one potential method of making these
to look like the images we see, and it's the way I've done it
with the best results. I've made it without the canvas
stiffening and also just be sewing the ruffle to the linen band,
but this is the way I have made my very sturdy version. It's definitely
more work, but the result was very pleasing to me.
What
you need:
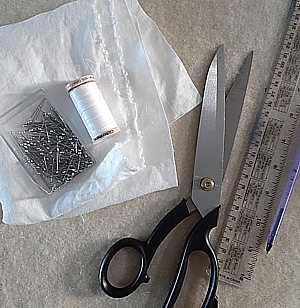
All you need is thread, a needle, pins, scissors,ruler, pen or
pencils, a long strip of linen the circumfrence of your head plus
about 1.5cm overlap, a strip of canvas or aida cloth the circumfrence
of your head plus 1cm.
 |
Step
1
You will need to decide how high you want your fillet to be.
Images in manuscripts vary, so gather your supplies.
If you're not sure, wide ruler can be a good guide. |
 |
Step 2
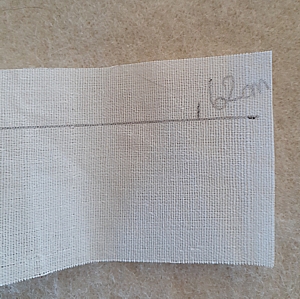
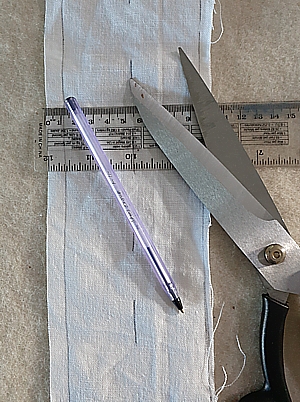
Cut your canvas.
I made mine a ruler
width and 62 cm long so it goes around my head. I've allowed
a little extra to fit a hairnet and hairpiece as well. 62cm
was my TOTAL of all of those combined. I have a small head.
Mark it out with a
pencil and then cut to size.
This is what you will
be using as a base for the linen, and will provide a little
bit of stiffness.
|
 |
Step 3
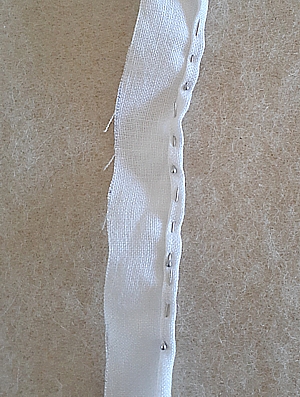
Mark your linen to cover the band. You'll need to make it
twice the width of your canvas PLUS enough to make a little
hem on each end for you to tuck under.
Make it as long as
your canvas PLUS 2cm. This will allow for some folding over.
I drew a dashed line
to remind myself to FOLD and not cut the middle. I also
drew 2 solid lined where the hems will go.
Cut it out. It should
look like this now.
|
 |
Step 4
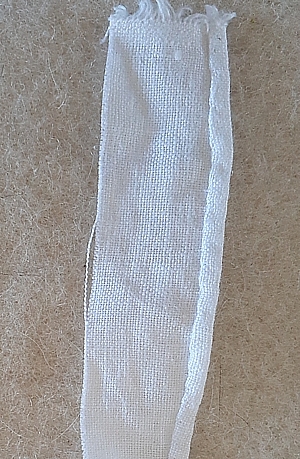
Cut an enormously long thin strip of linen and pin one side
like the picture.
This one was about
a ruler width to start with as it gets less wide with the
hem on one side and the gathering on the other.
I could have used a
salvedge and not hemmed, but I've found that the extra thickness
of the hem makes the ruffle a bit more ruffley.
It's definitely more
work and time consuming, but worth it.
|
 |
Step 5
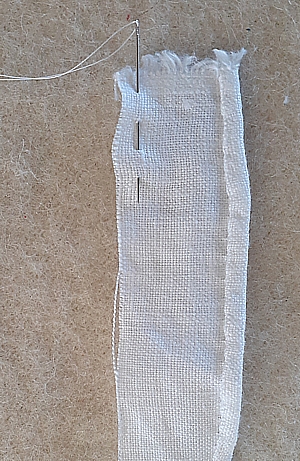
Here's the ruffle with the hem sewn down.
You can use a hemming
stitch or a running stitch. It really doesn't matter, but
I've found that smaller stitches hold the hem together and
are less likely to unravel when it's drawn together for
the frill.
|
 |
Step 6
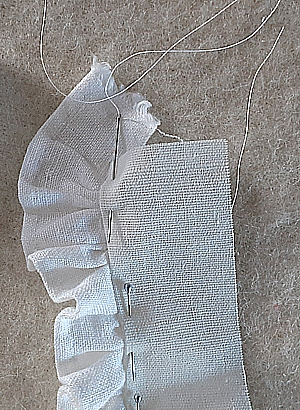
On the opposite side of the hem, do a line of running stitch
(that's the one that's just in and out) in reasonably large
stitches.
If the stitches are
too close, you won't get a nice ruffle, and if they're too
far apart, it won't ruffle enough.
|
 |
Step 7
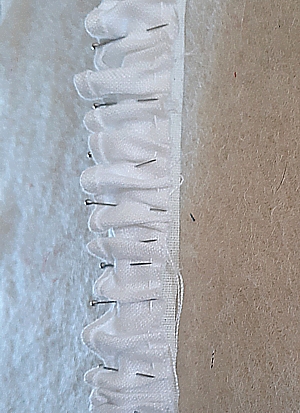
Pull the thread tighter and space out the ruffles.
When you're happy with
the pleating, pin the linen to one side of the canvas.
I find it easier to
pin along the pleats rather than across the pleats as it
holds them in place a bit better.
It should look a bit
like this.
|
 |
Step 8
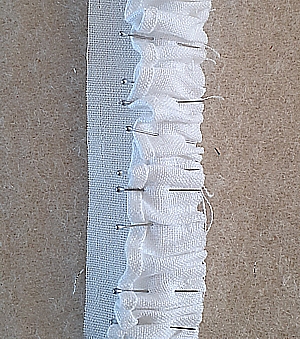
Here's another picture showing the ruffle pinned to the
canvas.
I'm pinning it to the
canvas base, NOT the other linen strip.
|
 |
Step 9
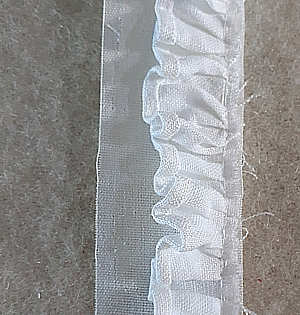
Now you've pinned the ruffle, sew another running stitch
or backstitch for extra sturdiness if you wish.
Sew the entire length
down and you can remove the pins.
It will look like this.
|
 |
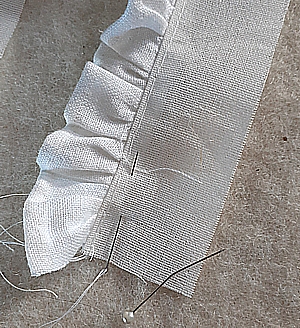
Step 10
What I did to make life easier later, is to fold the ruffle
upwards and then sew it in place.
This step may be completely
unnecessary, but I personally found that if the ruffle is
really secure and upright, it's easier than trying to hold
it upright and sew the linen to the canvas at the same time.
|
 |
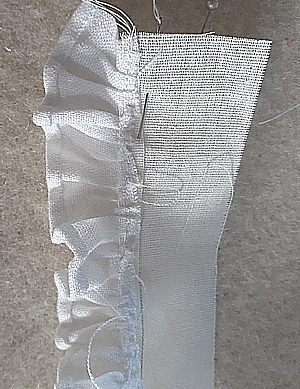
Step 11
You now have a ruffle made of linen free-standing and attached
to a band of canvas.
It should look a bit
like this.
|
 |
Step 12
This is the back view.
It's a bit messy and
very uninspiring, but don't worry. We are about to cover
the canvas with our folded linen strip which we cut out
at the start.
At this point, I sew
the two ends together to make a circle. I didn't photograph
that, but you know how. Any kind of stitch is fine. Whatever
works for you.
Just make sure you
test the size on your head again and remember, you will
probably have a hairnet and possibly a hairpiece underneath,
so allow for those things.
Let's do it!
|
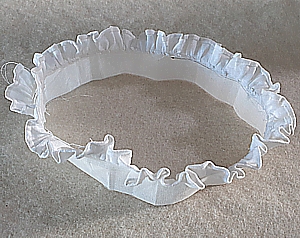 |
Step 13
Sewn into a circle,
it should look something like this.
Already you can see
what it's going to look like.
|
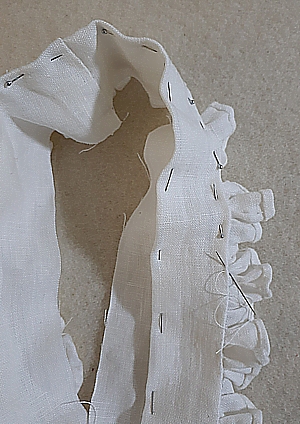 |
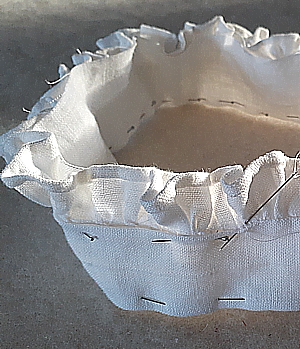
Step 14
What I've done here is folded the linen in the middle, and
then folded and ironed one of the hems.
What I didn't photograph
is sewing the two ends of the linen together. I did that
BEFORE I sewed the linen strip to the fillet.
The hemmed part goes
to the top, where the ruffle is. I recommend doing the BACK
side of the ruffle first.
Pinning the linen is
extremely important or it will wriggle around a little bit.
You can sew right through
the canvas and linen together as the front isn't pinned
onto the canvas.
|
 |
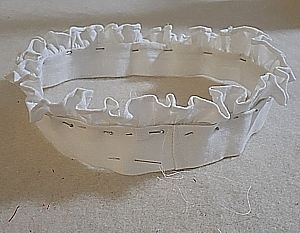
Step 15
Here's another view.
I'm sewing the INSIDE
of the fillet part, but it looks like the outside because
I've turned it inside out to sew. You can see on the frill
that I'm sewing the BACK of the frill first.
Once you've sewn the
back, turn your fillet inside out. Now you're ready to do
the outside.
|
 |
Step 16
I didn't take many photos at this point because I was sewing,
but essentially, you're going to repeat the same thing on
the other side which is the FRONT or outside of the fillet
circle part.
You won't need to pin
the bottom, as it will be held fast from the other side,
but it really is important to fold the entire length of
the linen and pin before you start to sew. Tuck the hem
part over as you fold and pin, pin, pin!
|
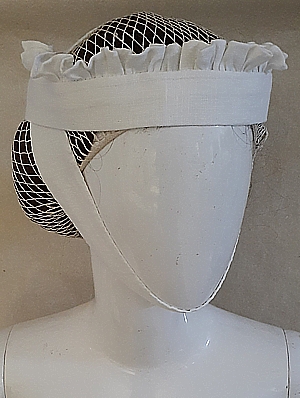 |
The end result!
I'm pretty pleased with this. The ruffle stands up quite
well as it's attached to the canvas, and the top of the
ruffle is reasonably ruffled as it's hemmed.
Hopefully you'll be
able to tailor this tutorial to your own needs and pick
out the bits which work for you. You might like to sew the
ruffle directly onto the linen band and leave the canvas
out altogether which will work quite will too.
I found it didn't keep
it's stiffness as well when I pinned other things to it,
but it would depend on the thickness of your linen too!
Happy sewing!
|

Copyright
© Rosalie Gilbert
All text & photographs within this site are the property of
Rosalie Gilbert unless stated.
Art & artifact images remain the property of the owner.
Images and text may not be copied and used without permission.
|
