|

fabrics
& sewing
basic
medieval
clothing
sewing
tutorials
eyelet
tutorial
buttonhole
tutorial
cloth
button
tutorial
lucet
cord
tutorial
tassel
tutorial
fichet
tutorial
fake
braid
tutorial
false
hairpiece
tutorial
cheaty
veil pin tutorial
medieval
chest
tutorial
medieval
stool or
pot stand
tutorial
how
to clean
a muddy hem
tutorial

|

Sewing
Tutorial:
Lucet Braid- Making A Four Sided Square Lace
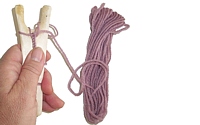
When medieval records talk about lace, they mean the kind of laces
that we use today for shoes. It was used to lace up clothes or
drawstrings for pouches. Braid or lace can be made by fingerlooping
or with a lucet. The advantage of lucet braid is that instead
of a round lace, it makes a four-sided square lace which I find
to be non-slip for clothing and drawstring pouches- everything
stay firmly laced in!
What you need:
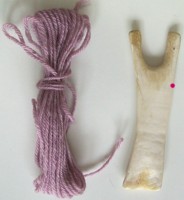
You need: a lucet or any other two-pronged instrument, wool or
crocheting cotton if you're not being 100% authentic. Wool is
good to practice with because it's thicker. Great until you get
your technique down, then even linen or silk thread can be used!
Crocheting cotton makes a great skinny braid for garment use.
 |
Step
1
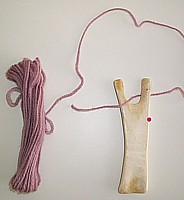
There's a bit of turning the front and back of the lucet around
involved, so I've put a pink dot on the side of the lucet
to help show which side is where.
Feel free to put a dot on your own lucet until you get the
hang of it. |
 |
Step
2
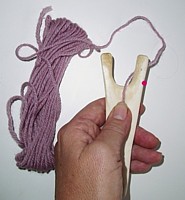
Start with your wool like this.
Obviously, if your wool is in your lap, it wouldn't be looping
over the top- I've got the wool on the table for demonstration
purposes. |
 |
Step
3
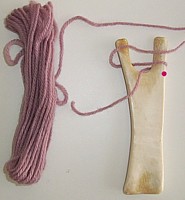
Put your thumb here in the middle of the lucet.
You will need to maintain a firm hold. As the braid grows,
you feed it under your thumb to keep an even pressure on the
braid and keep your work even.
Don't worry about that yet.
The wool goes behind the first prong like this. |
 |
Step
4
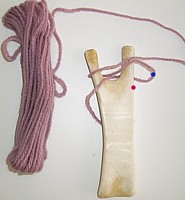
As you bring the wool towards the front, you now make a figure
8 around the two prongs until you have wool passing over your
original piece of wool.
It looks like this. |
 |
Step
5
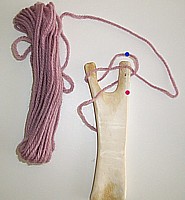
Where the blue dot is, pull the wool gently to make a small
loop.
It's the piece at the BOTTOM. |
 |
Step
6
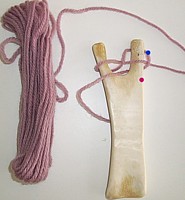
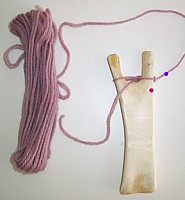
Lift the loop where your blue dot is over the top of the starting
prong. |
 |
Step
7
It's now sitting at the back like this. |
 |
Step
8
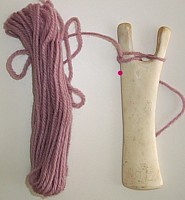
Pull your wool to the right hand side of the lucet to tension
the entire thing.
The purple dot is where you're pulling. |
 |
Step
9
So far, so good!
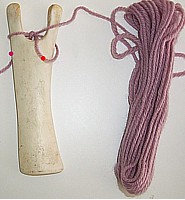
Now turn your lucet clockwise towards you so your lucet front
is now your back.
The pink dot is now on the other side of the lucet. |
 |
Step
10
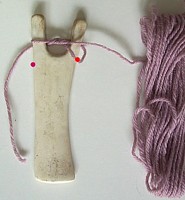
Pull your wool so it lies ABOVE the existing wool on the right
sided prong.
Your wool goes ABOVE the piece with the orange dot. |
 |
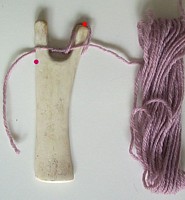
Step
11
Just like you did at the very start, make a loop by pulling
the wool at the BOTTOM where the orange dot is.
You have your loop now. |
 |
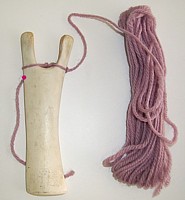
Step
12
Over the prong goes your loop just like we did before. |
 |
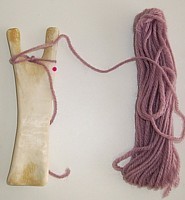
Step
13
Pull the wool to the right hand side to tension it and (the
same as before) turn your lucet clockwise towards you so your
lucet back is now your front again.
The pink dot has now made a complete circle and is back where
it started. Congratulations! That's how it's done.
Remember- always turn your lucet clockwise, not back and forth. |
 |
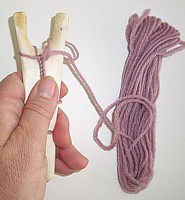
Step
14
It's now looking like this again. Exactly like Step 10.
Next you're going to pull a loop out at the bottom and over
the top of the prong it goes.. |
 |
Step 15
The first few rounds will not look too great, but after
a few minutes, you will see a braid start to form. Keep
your thumb pulling downwards on the wool and when you turn
clockwise, keep a little pressure from your hand to hold
it steady. Getting the tension right is half the trick.
Too tight, and your loop won't go over the prong, too loose
and you'll have a very loose, loopy braid. Starting out
can be slow and full of tears, but once you've got the hang
of it, it's something you can do almost anywhere and anytime!
Happy sewing!
|

Copyright
© Rosalie Gilbert
All text & photographs within this site are the property of
Rosalie Gilbert unless stated.
Art & artifact images remain the property of the owner.
Images and text may not be copied and used without permission.
|
