 |
Step 1
You need: a pattern, your wool, pins, scissors, tape measure
and your leg for sizing.
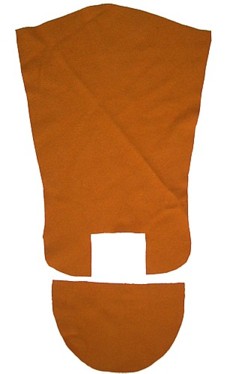
This pattern here is my own and to scale; and you are welcome
to upscale it on a photocopier. I suggest you cut a paper
one out before you cut your wool to check that the calf
measurement will reach. If the calf is wide enough, everything
can be taken in from there.
Things to remember!
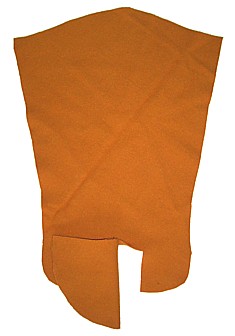
Cut your hose out on the diagonal. Your hose will have no
give at all if you don't and you will not be able to get
your foot into the bottom! The bias cut gives the hose some
stretch and makes it fit so much better.
Everyone has different shaped legs. Even an expensive bought
pattern will need to be put on your leg and pinned to shape.
Take the hose off and on again AFTER you've pinned it and
BEFORE you sew it to make sure your foot will fit through
the ankle where it is thinnest.
|
 |
Step 2
Firstly we will add the foot to the rest of the hose. There
is no separate sole. This pattern makes its own sole as
it goes.
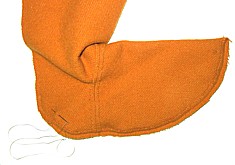
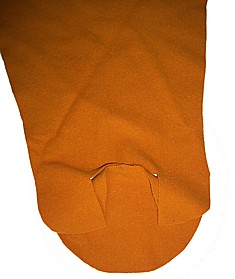
Fold the foot in half like the picture and pin to the centre
of the U shape.
I really do not recommend starting at one end and sewing
along to the other end as often it just doesn't line up.
We are going to sew from the centre outwards to the left,
then go back to the centre and sew outwards to the right.
It seems like a lot of fussing, but with the wool cut on
the bias, sometimes it stretches a little as you sew and
then you end up unpicking it and starting again. Let's not
do that.
|
 |
Step 3
So, we have pinned in the middle and will be sewing to the
edges.
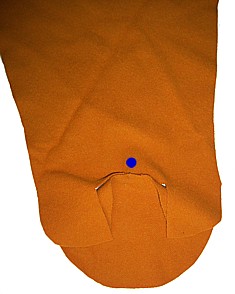
As you sew, the straight line of the semicircle will go
along the sides like this.
Although there is a right angle on the main part of the
hose, it is easy to straighten it as you sew because it
was cut on the diagonal and is quite stretchy.
|
 |
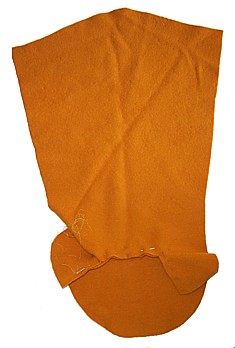
Step 3a
Last minute check.
You are starting from
the blue dot when you sew.
|
 |
Step
4
Pin! pin! pin!
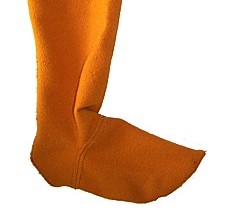
Sometimes there may be a tiny bit of the main part of the
hose not meeting up with the foot. Don't worry about that.
You'll be trimming the seam very soon.
I use a backstitch, so it's extra sturdy, but a running stitch
is just as good.
All good? Right! Let's continue. |
 |
Step
5
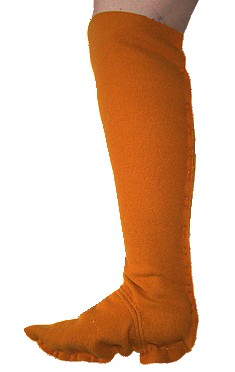
After you have sewn the two bits of wool together, you will
need to stitch down the seam. For new sewers, there is a close
up at Step 12 of how to do this, so scroll down if you are
new to this technique and don't understand what I mean.
To explain for new sewers- Imagine you are using an overlocker..
the two little bits of the seam with raw edges are sewn
together to prevent fraying. In order to not have a bulky
seam, we are folding the seam open like pages of a
book and sewing the individual sides down to the main part
of the wool.
Still not sure, check Step 12 and come back. |
 |
Step 6
Now you've stitched down the seam that joins the foot to
the main part of the hose, you're ready to shape it to your
leg.
There will be a bit of fiddling around with this step as
your foot is generally wider than your ankle and getting
a good fit and being able to take your hose off and on again
will need some pinning and re-pinning. And re-pinning.
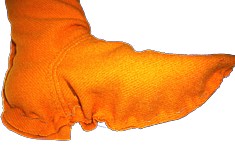
You will notice the the hose wraps around under your foot.
That's where your sole came from!
There may be quite a bit to trim off your foot around the
heel.
Once you are happy with the fit, take your hose off and
cut to shape. Leave enough room for a seam.
Try your hose on again. If you need more trimming, now is
the time.
It will look like this.
|
 |
Step
7
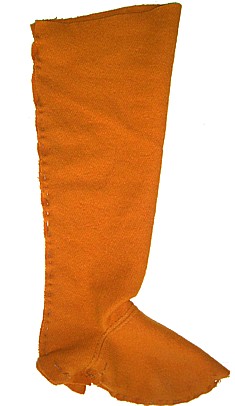
A close-up of fitting the foot. I don't mind leaving a pointy
toe on my hose as it fills the toes of my shoes. If you don't
have much room in your shoes, you may want to trim at the
toes more than I have. You will notice I needed to trim my
heel even more.
Just check the hose goes on and off before you cut! |
 |
Step
8
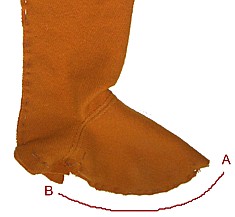
Here's what your hose looks like now when you take it off.
I always leave cutting the heel a final time until after the
foot of the hose is sewn and stitched down. I find I get a
better fit that way.
You can trim your heel if you're happy with your fit.
You will also notice that the front of your hose at the top
is higher than the hose at the back. This just sits nicer
around your knee.
Happy with the fit? Are you sure?
Let's get sewing! |
 |
Step
8a
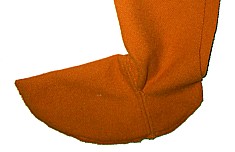
You will be sewing in this direction, from A to B.
Because you are sewing by hand and will need to stitch down
the seam, I heartily recommend you stitch just the foot at
this stage.
Once you have stitched that part of the seam down by folding
the seam open and sewing them, you can do the leg.
Word of warning: If you sew the entire leg all the way up
to the top, you will find the bunches of wool in your hand
to be very bulky and the stitching down process is very hard.
Don't do it. Just sew the foot first. |
 |
Step 9
This picture shows the backstitched seam from the toe to
the ankle.
I've unpinned the rest of the leg to make holding the wool
easier.
Now I'm ready to stitch down the seam like I did for the
foot to the main part of the hose.
|
|
|
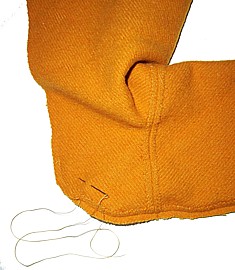
Step
10
Start at the toes again and work towards the ankle.
Fold one of the raw edges up so it lies flat on the main hose
and stitch it down. This takes ages, but remember that these
seams are going to be under your feet and that you will be
walking on them, so you want a flat as possible seam.
There's a closer picture underneath. |
 |
Step
11
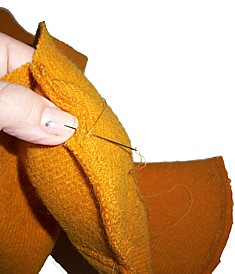
You should be able to see how I've only folded one of the
raw edges over and sewn it down.
If you're new to this technique and it still isn't making
sense, it's because it's so much easier to demonstrate in
person than it is to write it down, so don't be depressed
if it still isn't making sense to you.
Step 12 is a photo from another angle which better shows what
I'm doing when I'm stitching it down. This is the same kind
of stitch as hemming. The stitches are closer together because
wool frays easily. Scroll down and come back and see if this
picture makes a bit more sense. Hopefully it will.
Yes, it's a slow process, but the result is worth it! |
 |
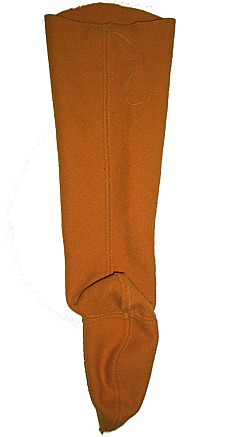
Step
12
A look at what to do when you're stitching a seam down. It's
a little hard to see because the thread is the same colour
as the wool.
Above my thumb you can see the two bits of raw edge from after
I've sewn the seam. On an overlocker, they would be sewn together.
Under my thumb, you can see how I've flattened the two raw
edges out. I'm sewing the raw edge to the main part of the
hose. Then you turn the sewing around and sew down the other
side.
It takes longer than sewing it all together, but remember,
you will be walking on this, so you want it as flat as possible.
This technique is also fabulous for any woollen garment or
hood to avoid bulky seams. |
 |
Step
13
Okay... now the foot is all stitch up and sewn down, you can
repin the back seam of the hose.
Slip in on your leg again for a last fitting, and adjust if
you need to.
Once you are happy with the fit, backstitch or running stitch
the seam working from the heel up to the knee.
Once you have done that, it's time for the time-consuming
job of stitching down the seams like we did for the foot.
This picture shows how there is a cross under your foot. This
is why we stitched down the seams and didn't just use an overlocker.
Imagine how chunky that join would be. Now imagine a busy
day walking around on it. Even though there is still a seam,
the wool is softish and it's not very noticable to walk on.
Since a lot of medieval turnshoes have thin soles, feel free
to add some sheepskin liners to your shoes to cushion! |
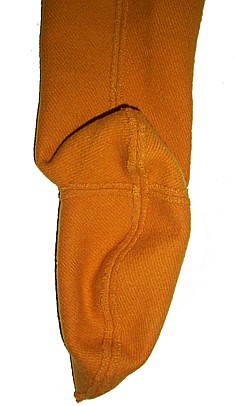 |
Step
14
A close up on how it looks under your foot with all the seams
flattened and stitched down. |
 |
Step
15
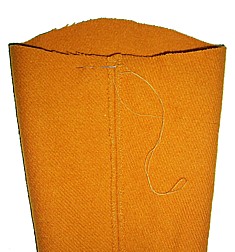
Okay! It's time for the finishing touches!
The raw edge at the top just needs to be stitched down and
we are finished! |
 |
Step
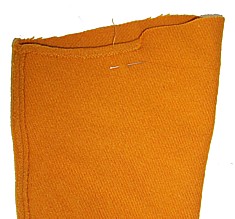
16
Just fold the edge over and use a hemming stitch. You can
do a rolled hem if you like, but it's bulkier and after a
few washes and wears the single fold is still quite fine and
sometimes sort of melds to the main hose.
This is exactly the same as the stitching down, only there
is only one raw edge to fold over and sew.
Just remember to use small stiches so it doesn't fray. |
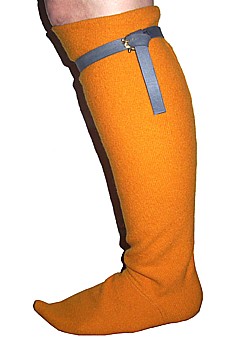 |
The
finished result
Turned right side out and with a blue leather garter, the
new hose!!!
If you don't have a garter, a piece of colourful webbing tied
in a bow will be fine. You can also roll to top of the hose
over the garter to stop slippage if you like!
Hopefully, you're feeling that all the hand sewing was worth
the end result!!
Happy sewing!
ps. Yes, I also wish my hose would be more snug around the
front of my ankle. Every set of hose I make improves. Even
for an experienced sewer, sometimes it just takes a while
to get a perfect fit!! |