|

fabrics
& sewing
basic
medieval
clothing
sewing
tutorials
eyelet
tutorial
buttonhole
tutorial
cloth
button
tutorial
lucet
cord
tutorial
tassel
tutorial
fichet
tutorial
fake
braid
tutorial
false
hairpiece
tutorial
cheaty
veil pin tutorial
medieval
chest
tutorial
medieval
stool or
pot stand
tutorial
how
to clean
a muddy hem
tutorial

|

Sewing
Tutorial:
How To Sew Eyelets
Making an eyelet for your medieval dress is easier than you might
think. You don't need to know any fancy stitches or have a hole
punch or metal eyelets. These eyelets are rock solid and all you
need is a needle, thread and something pointy.
What you need:
You need thread to match your gown (silk, wool or quilting thread),
a needle, something sharp and pointy (an awl, a roofing nail,
a chopstick.. whatever you have lying around)
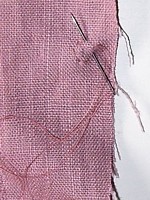 |
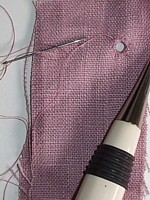
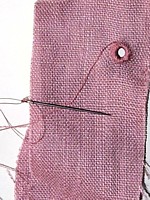
Step
1
Mark where your eyelet will go and backstitch a circle around
it.
Don't make it too tiny or too large. Remember your eyelets
are SUPPOSED to be smallish and set about 2cm apart, and about
5mm from the edge of the fabric.
Eyelets which are set too far from the edge or too far apart
will usually gape. This is usually the problem with bought
"medieval" dresses- the eyelets are way too far
apart. |
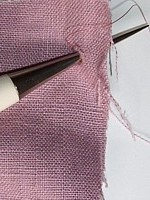 |
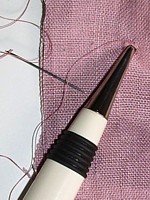
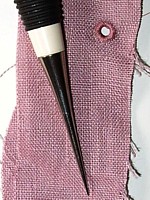
Step
2
Using an awl (chopstick, roofing nail, whatever you have handy)
push the fibres apart to make a hole. On NO ACCOUNT cut the
fabric into a cross or use a hole punch.
This will weaken the fabric and cause tears later on when
lacing the gown closed if it's pulled tightly. The pushing
the fabric apart with the awl will also create a little bunchy
bit at the rim of the eyelet which will make an extremely
strong eyelet. |
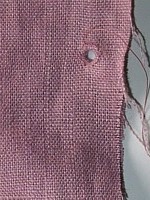 |
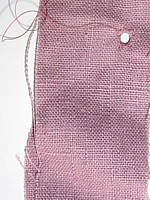
Step
3
Here's a pic of the backstitched circle after it's been pushed
wide with the awl. |
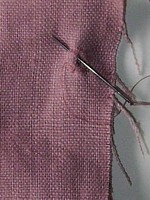 |
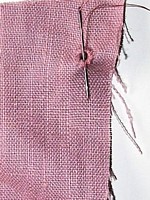
Step
4
Hold the hole open with 5 or 6 stitches.
If you've made eyelets before, you may have noticed that as
you start to stitch, the hole closes up and gets uneven. The
holding stitches will help this stopping. |
 |
Step
5
Now you have a round hole held open with a few stitches. Hopefully,
it's nice and round like this one.
You may have found that your eyelet seems a bit smaller than
it did when you started. That's okay. These are just the holding
stitches. |
 |
Step
6
Once you've got a few stitches holding the fabric open, use
the awl again to push the fabric apart and keep your eyelet
open.
Your backstitch circle will help to stop the awl/pointy thing
from just tearing the fabric.
Give it a few gentle goes. |
 |
Step
7
After the awl is removed, your eyelet is open and round and
ready to proceed with the eyelet! |
 |
Step 8
Start stitching the eyelet itself now.
Just go round and round and round pulling firmly as you
go. No fancy stitches needed. Just go round and round.
Use the awl to push the hole apart as you go to keep the
eyelet a decent size. You'll find the holding stitches stop
your eyelet from fraying and keep you sewing in the right
place.
|
 |
Step
9
Just keep going until you're all the way round.
If your eyelet looks a bit patchy, go around a second time.
I often use hand quilting thread as it's a bit thicker than
cotton. If you're using cotton, you may want to go round twice. |
 |
Step
10
Voila! Eyelet! Tie the thread off at the back with any kind
of knot. I like to slip the thread through the back of the
eyelet as well for extra neatness. A last poke with an awl
will even up your eyelet. If you need to make your eyelet
a little wider, push a little harder with your awl.
Remember, your eyelets are supposed to be fairly smallish.
Lacing cords weren't big and chunky and women were often laced
into their dresses with a needle (a mattress needle works
well) or with a lace with a metal aglet to provide a built-in
needle. Each eyelet takes about 20 minutes when you're starting
and about 15 minutes each once you get good at it. Happy Sewing! |

Copyright
© Rosalie Gilbert
All text & photographs within this site are the property of
Rosalie Gilbert unless stated.
Art & artifact images remain the property of the owner.
Images and text may not be copied and used without permission.
|