|
Step
1:
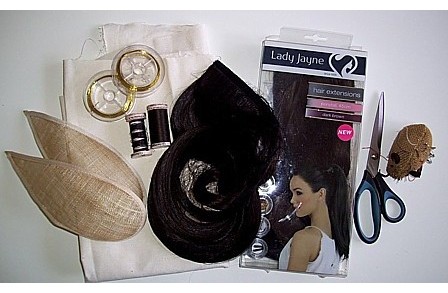
Gather your things and check you have everything.
|
Step
2:
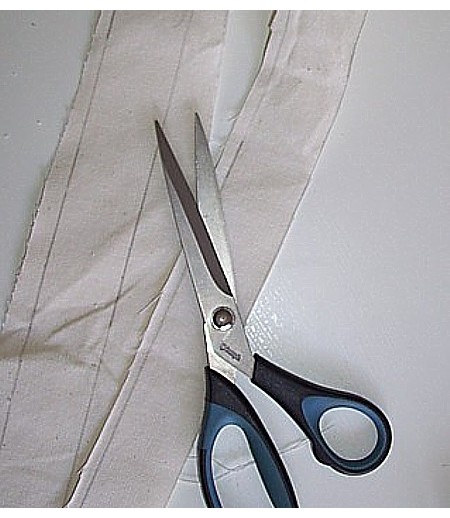
Firstly, we are going to make the headband to attach the two
sides to. Using your buckram or stiffened linen, measure out
a band which goes around your head. Add a little for joining,
and double the width (so when it folds over, it will be the
right size.) If you only have thin stuff, just cut two and
sew one side together leaving the bottom open.
 |
Step
3.
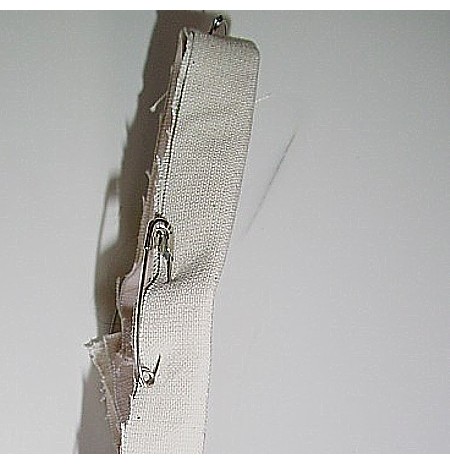
I've pinned the open side together temporarily. The right
side is the folded over side and goes to the top.
 |
|
Step 4.
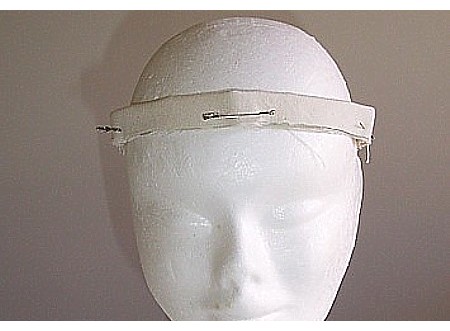
You can see here how it will sit on your head. At the very
end, you will stitch the open bottom ends closed with a
little whip stitch where it will be almost unnoticable.
Okay. We have a headband to attach to side to. Now to get
the sides in position.
|
Step
5.
We are going to make sure the sides sit not too high or not
too low. Place one base over your ear and fold where to think
your headband will sit. Don't worry about being too exact.
We will adjust in a minute. Do the other side as well. It
is important that you have bought the bases with the wire
around the edges as it will let you shape your bases a little
and provide structure. Now to attach and adjust.
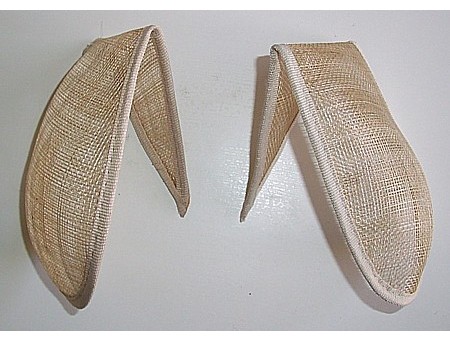 |
Step
6.
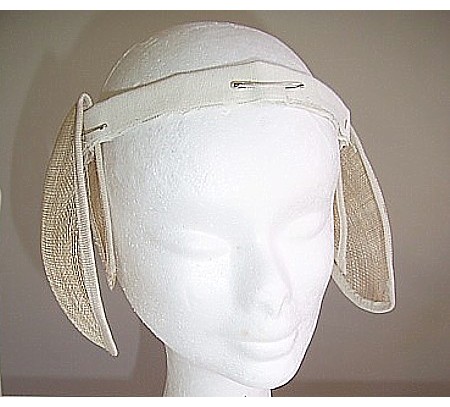
There will be a front and a back, so put your headband on
and slip your bases over the top so they look like this. Wriggle
the bases forward or back until they are in the right place.
If they are sitting too high or too low, you can adjust them
now. We will cut them shortly.
 |
Step
7.
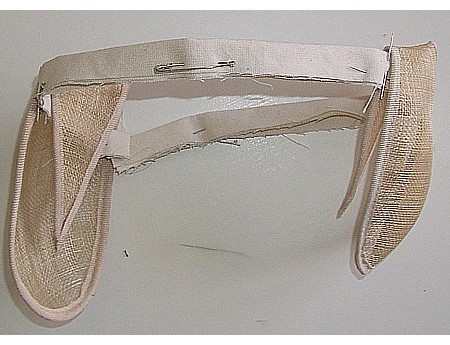
At this stage, your hairpiece looks like this.
 |
Step
8.
Do a second try on. Double check you have marked where the
front of your hairpiece will sit. This foam head is smaller
than mine, so the side pieces look huge, but on my head, it
sits where it should. If you are working with a foam head
and it looks like this, don't be too concerned.
 |
Step
9.
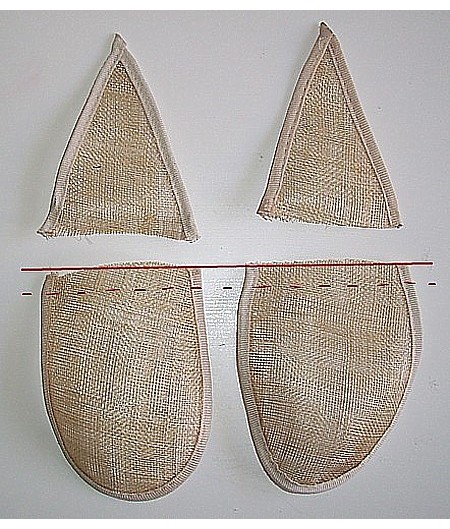
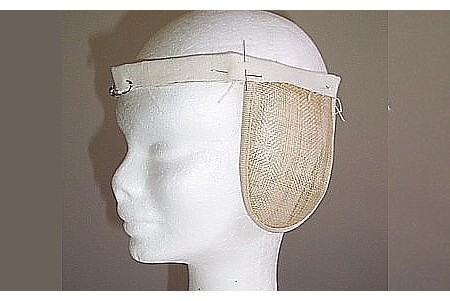
Cut off the excess tips of the bases. Always leave the base
a little longer rather than a little shorter. The top inch
or so will tuck into your headband. In the picture, the top
of the headband is the solid red line and the open part of
the headband is the red dotted line.
 |
Step
10.
Hooray! You have your two hair bases ready for some hair!
 |
Step
11.
Double check time. Slip your bases back into the headband
so they sit all the way into the top. Try them on and check
that your bases are not sitting too low. If you need to adjust
them higher, now is the time to do that. Okay, let's get hairy!
 |
Step
12.
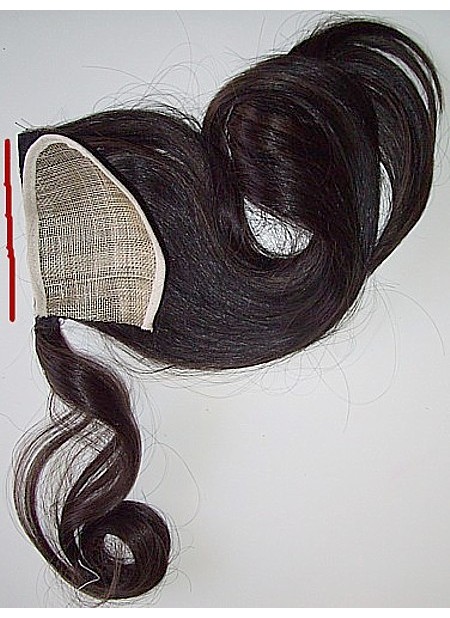
The Lady Jayne ponytail piece comes on some slide combs. Unpick
the thread so they come off. You will have a straight edge
(where the red line is) which most of the hair comes off and
a little extra piece which would normally wrap around the
ponytail. You have two choices: Cut that little bit off OR
keep it for a little plait at the end. I kept mine on. Line
up the straight edge with the side of your base like this.
Put some pins in for the moment.
 |
Step
13.
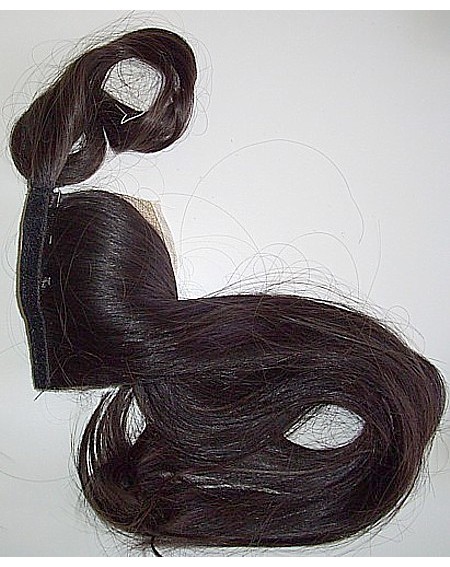
When you turn it over, it looks like this. You can see the
straight edge better from this side.
 |
Step
14.
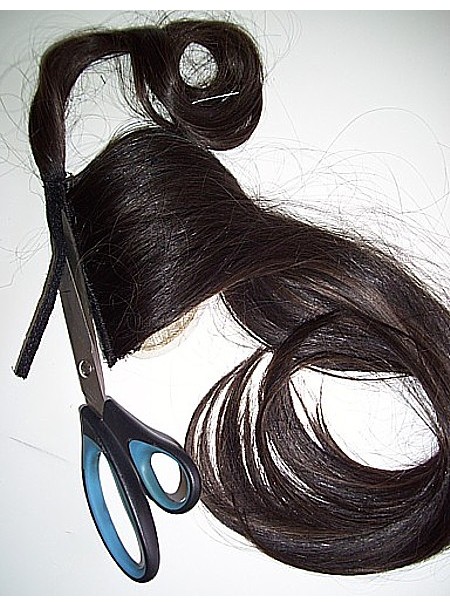
The ponytail is sewn onto the straight bit. The straight bit
is wider then we need, and we can trim it in half so there
is less of the modern edge on it. Don't trim too low, or you
will cut the hair off.
 |
Step
15.
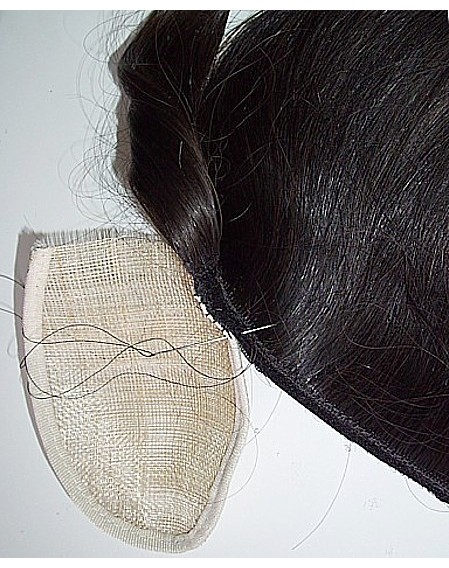
Sew the straight edge of the hair to one side of the base.
Use a strong thread. I have used quilting thread as it blends
in with the hair extremely well. If you are having trouble
pushing through the layers, try using a leatherworking needle.
 |
Step
16.
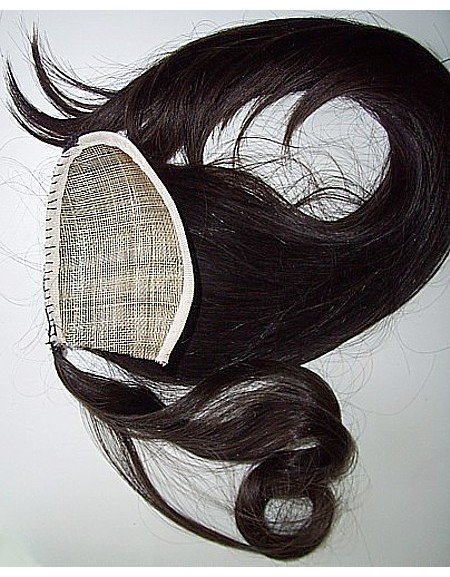
This is what it looks like when you're finished. My stitches
weren't that even, but the main thing here is that the hair
is sewn on securely.
 |
Step
17.
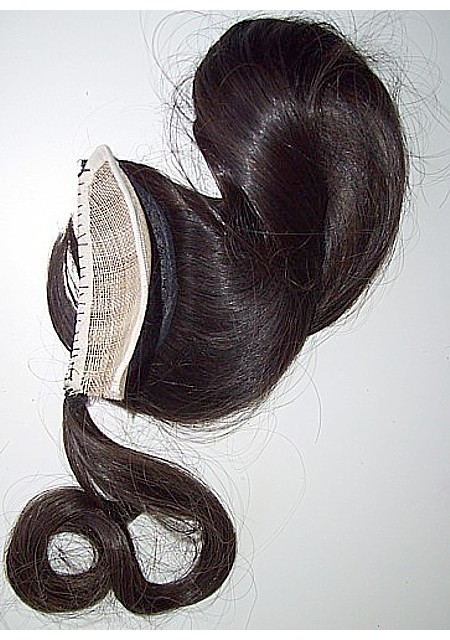
Side view.
 |
Step
18.
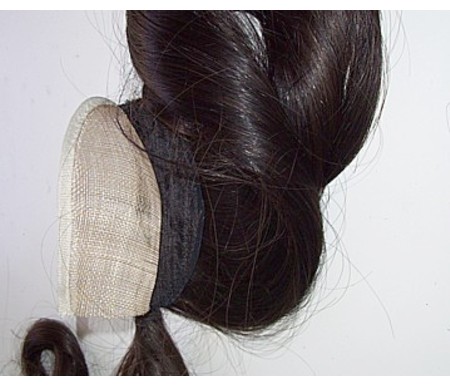
View from the outside. Now the braiding is about to start!
 |
Step
19.
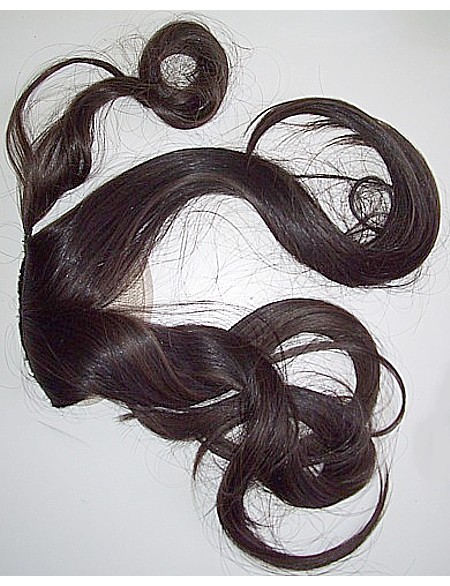
Here we go! The base goes with the cut side to the top and
the round side to the bottom. Part the main part of your hair
into two roughly equal sections. We will be braiding separately
and winding around. Don't try to just do one big braid. The
hair will be really bulky on the sewn-on side and it won't
give you the finished look we are after. So- divide into two.
The little skinny bit doesn't get braided into this. keep
it by itself.
 |
Step
20.
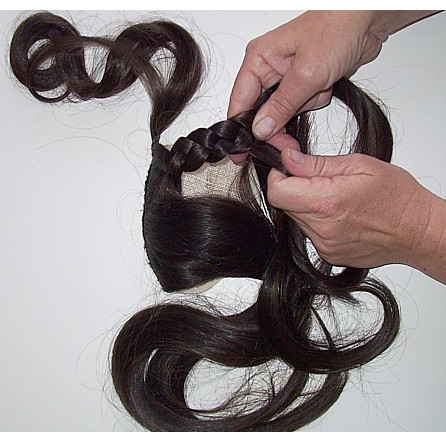
Start with the top section of hair and make a three-strand
plait like you would with normal hair. When you get to the
end, tie it off with a rubber band for now.
|
Step
21.
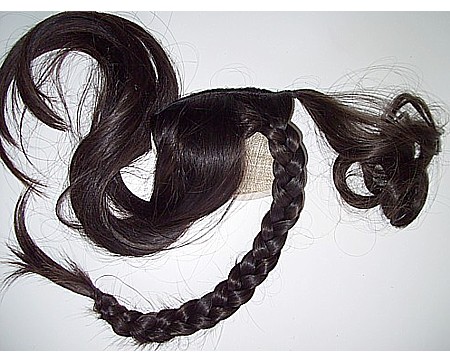
It should look like this. If you're happy with the evenness
of your braid, tie it off with some matching thread. This
was possibly the hardest part for me as the thread kept slipping
off the hair. I ended up tying some thread to the hair before
the end of the plait and plaited the last few twists with
the thread in with the hair.
 |
Step
22.
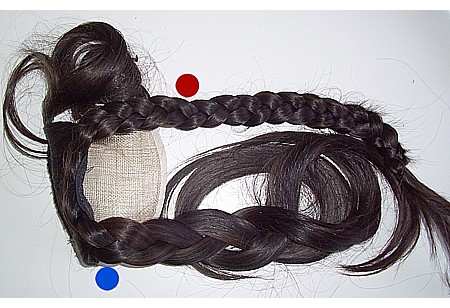
Do a three-strand plait on the bottom section of hair. For
the sake of keeping it easy to follow, the top plait is the
RED one and the bottom plait is the BLUE one.
 |
Step
23.
Okay. Here we go. We are working with the BLUE bottom plait.
Take the BLUE bottom plait and curl it around the bottom of
the base and around the edges. Don't sew anything. We are
just checking placement. The top RED plait sits up at the
top. It goes nowhere just yet. It is curled around for the
photograph, but it just needs to be doing nothing. We come
back to the RED plait later. Plait the tiny third piece.
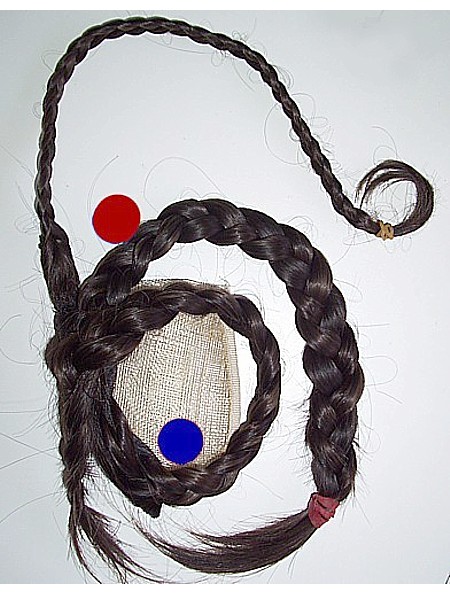 |
|
Step 24.
Still using the BLUE bottom plait, curl the plait into a
spiral like this. It won't sit flat properly. Don't worry.
It will sit in from the edges. (The RED plait will go around
the edges later, so don't go all the way to the edge with
the BLUE plait.)
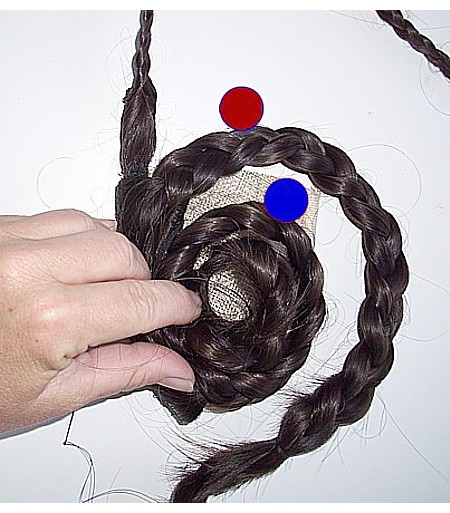
|
Step
25.
We are going to start sewing the BLUE plait here.
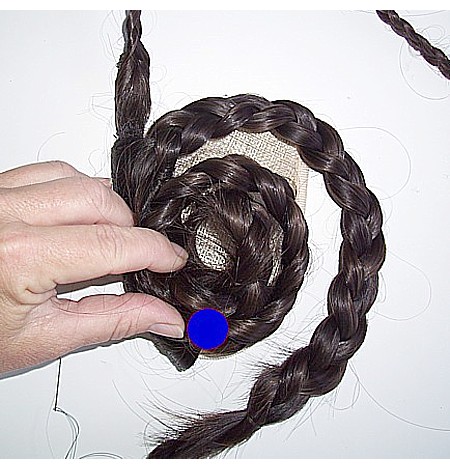 |
Step
26.
Thread your needle with a double thread for strength. Start
on the wrong side and knot your thread somewhere roughly in
the right area. Mine is a little towards the middle, but that's
okay.
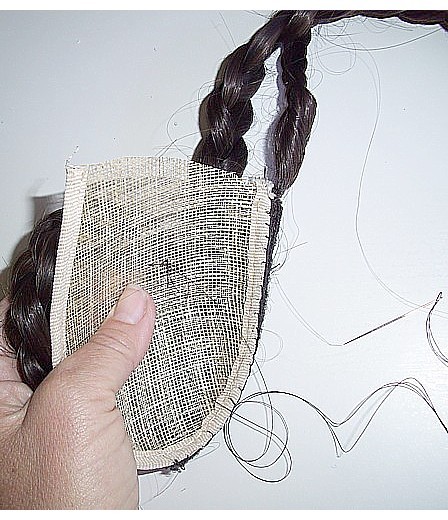 |
Step
27.
In this photo, the base is upside down to make it easier for
me to hold, sew and photograph at the same time. By "upside
down", I mean, I am holding the cut bit which goes to
the top. I am sewing the BLUE plait around the curved part.
The RED plait still does nothing. It all sort of fell apart
as I started sewing, so I will just replace it as I go. Check
the next pic.
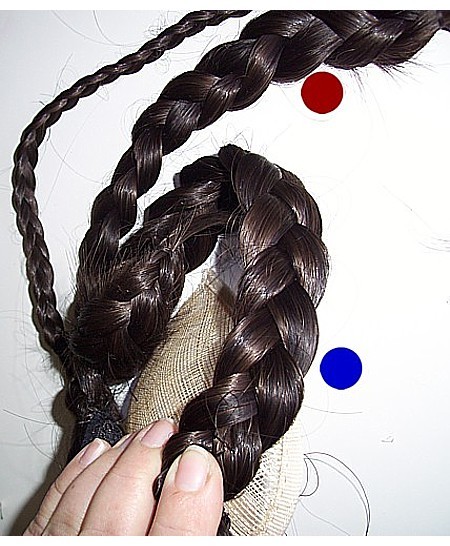 |
Step
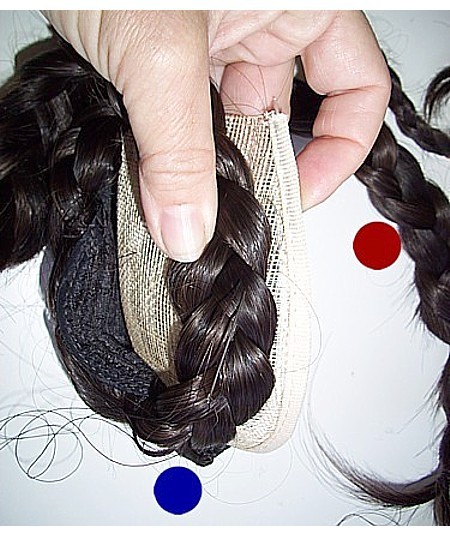
28.
Turned up the right way again... the BLUE bottom plait is
being sewn on to fill in the middle bit. The RED plait does
nothing. You can see on the left hand side how the start is
sitting a little too upright and wonky. Don't panic just yet.
We will come back and stitch that down later. Your plait may
not also sit well as you sew it on, but the final stitching
pulls it all into place at the end. We are filling in the
MIDDLE bit at the moment.
 |
Step
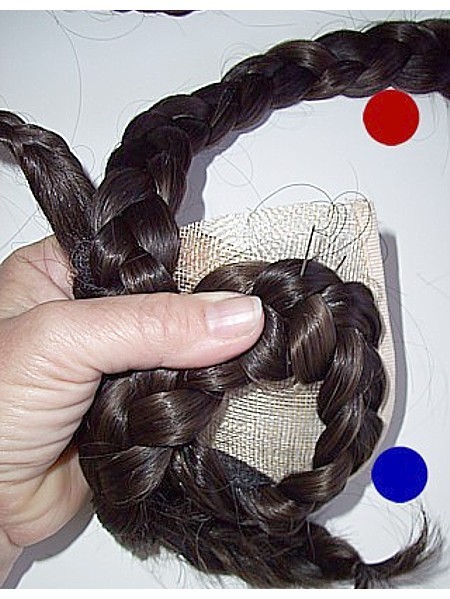
29.
Curl the BLUE plait around like this and sew the edge down.
Make sure you leave room for the RED plait to fit around the
side later on. The RED plait does nothing just yet.
 |
Step
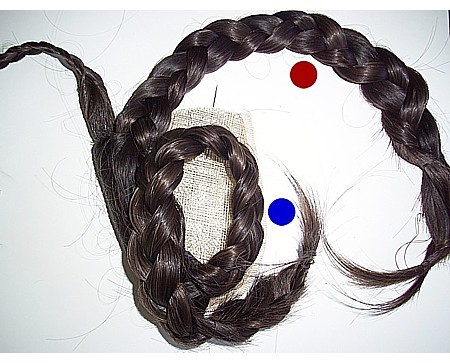
30.
Double check on the plaits. BLUE bottom plait being curled
and sewn. RED top plait doing nothing. Little plait out of
the way. Okay. Keep sewing the BLUE plait into a curl.
 |
Step
31.
The end of the BLUE bottom plait tucks into the curl. The
scruffy ends are hidden away under the plait. It looks like
a bit of a bird's nest at this point. Soon we will stitch
the middle flat, but for the moment, it looks like this.
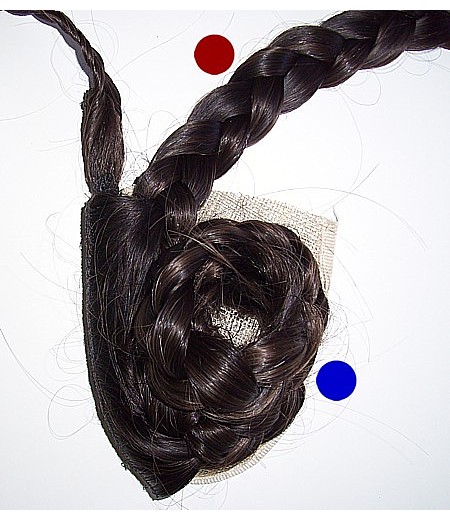 |
Step
32.
Stitch the middle of the BLUE plait down and it will look
like this. It's starting to look like a real hairstyle now!
It's not perfect, but you can fiddle with it at the very end.
We are ready to use the RED top plait now.
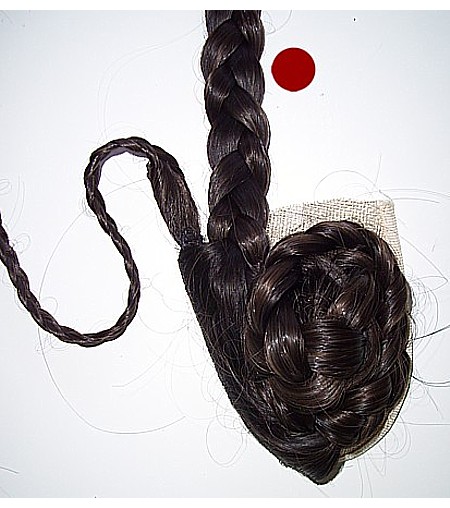 |
Step
33.
Curl your RED top plait around the middle curled plait. It's
starting to look good now!
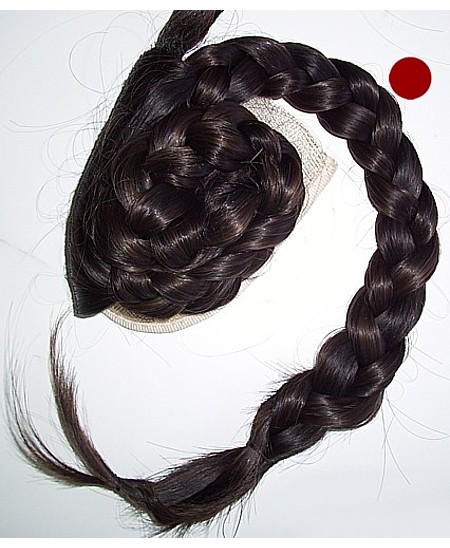 |
Step
34.
Stitch your RED top plait around the blue curled plait.
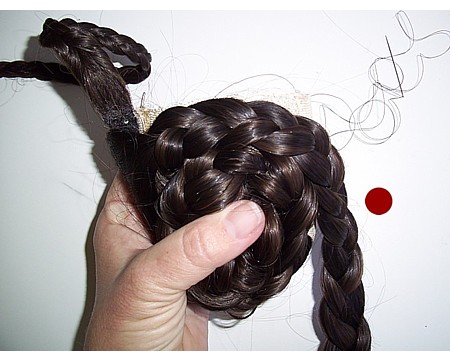 |
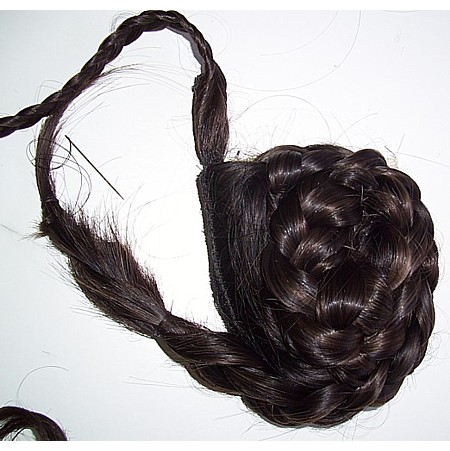
Step
35.
Keep stitching. The part that we cut right back at the start
will be covered by the plait.
 |
Step
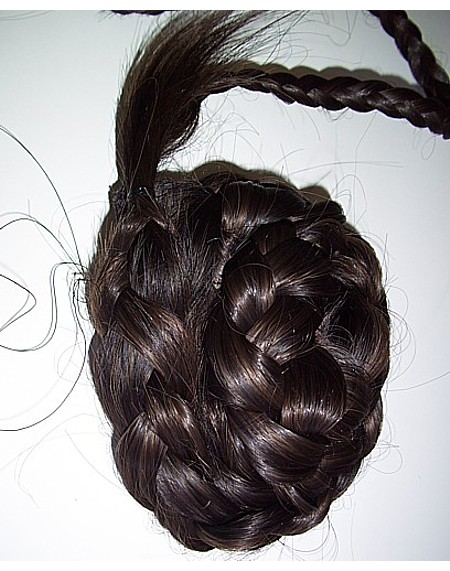
36.
Keep stitching! Your hair should look like this!
 |
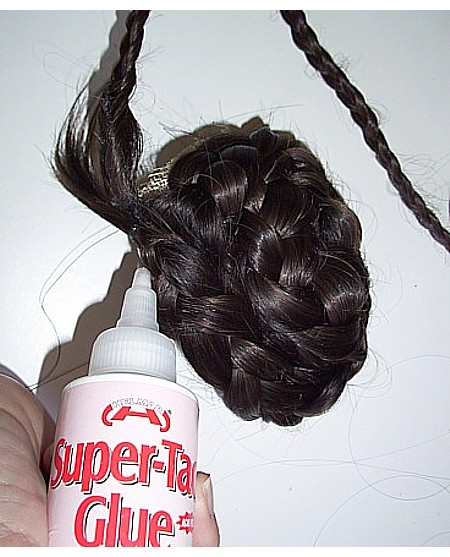
Step
37.
Tuck the very end under the plait, and glue it.
 |
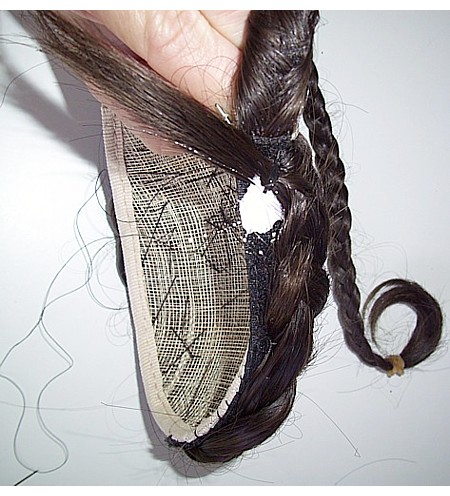
Step
38.
Side view of the glue. This will be covered up soon, so don't
worry if it looks a little scrappy.
 |
Step
39.
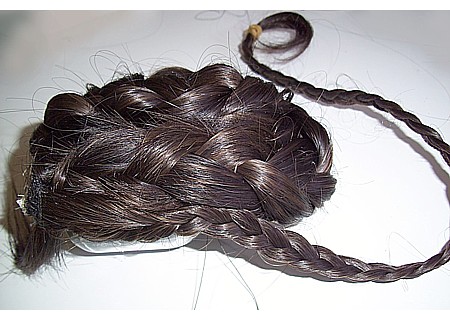
Okay, remember that little plait? If you didn't cut it off,
it is the perfect to cover up the very, very edges all the
way around. This is very pretty as well. Of course, manuscripts
do not show a little plait wound around the very edge, so
if you are feeling ultra-accurate, just leave it off. Remembering
you will most likely have some kind of veil or wimple, it
does give a nice finishing edge.
 |
Step
40.
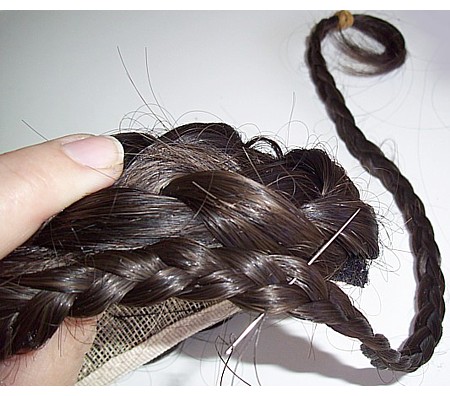
Stitch the little plait around the edges like this.
 |
Step
41.
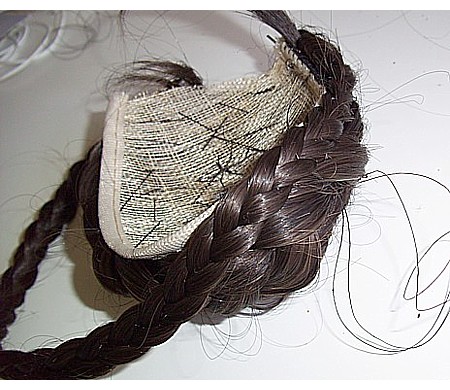
Keep stitching. It covers the wire edge.
 |
Step
42.
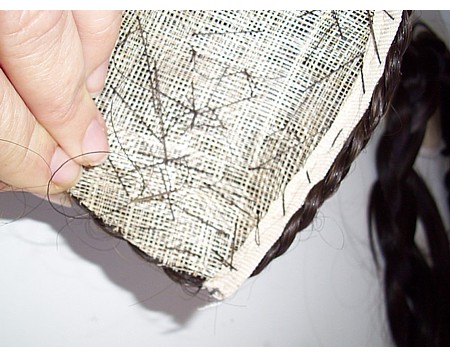
This is what the underside looks like. It's not very pretty,
but the important thing is that the outer side looks amazing!
 |
Step
43.
Okay- finish off the little plait around the edges.
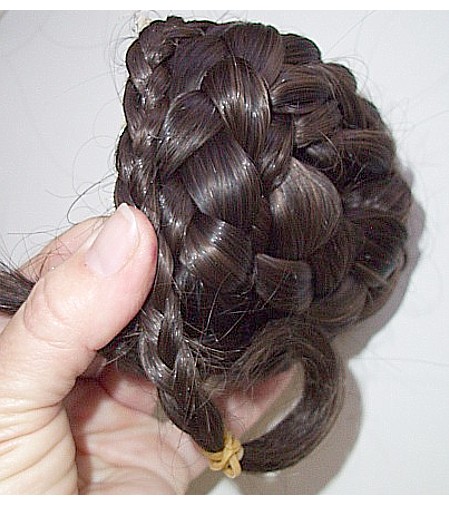 |
Step
44.
The little plait should easily go the entire way around the
edges.
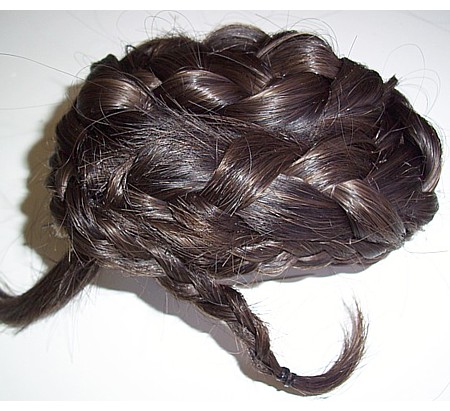 |
Step
45.
Tuck the end of the little plait underneath and stitch it
down.
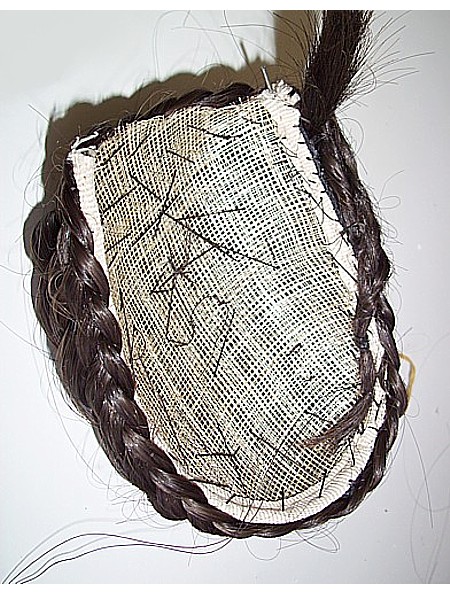 |
Step
46.
Looking at the right side, it should look like this.
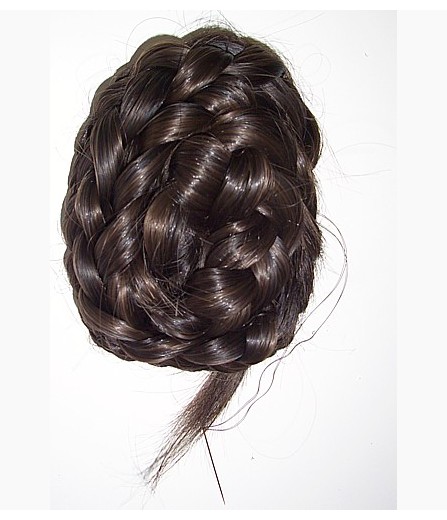
|
Step
47.
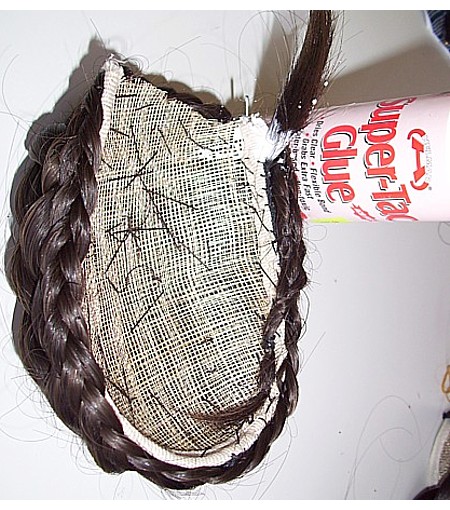
Glue the end bit we tucked under.
 |
Step
48.
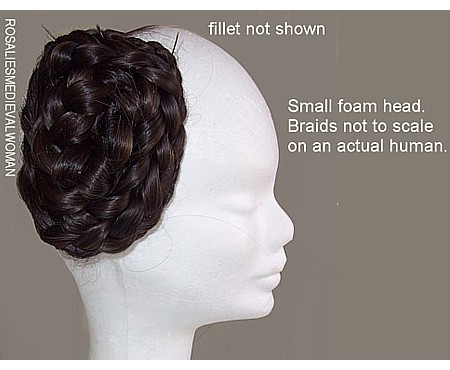
TA DA!! You have a very nice braided hairpiece. Now, repeat
for the second side and sew to your headband. (Headband not
shown in this photo.)
 |